Ubuntu 20.04 LTS ‘Focal Fossa’ Server Installation Step by Step Guide
Canonical has released its latest Ubuntu Operating System as “Ubuntu 20.04 LTS ‘Focal Fossa’ on April 23, 2020. As per Canonical its a best release to date. Ubuntu 20.04 LTS is an enterprise-grade, secure, cost-effective operating system for organisations and home users. It has been released for desktop and Servers – but what’s new?
Before starting installation steps, let us see what new features it comes with
A summary of new Ubuntu 20.04 features:
- Its ships with Linux 5.4 kernel release. Which brings improved hardware support.
- Faster boot speeds
- Focal now shows your computer’s OEM logo on the boot splash.
- Shipped with GNOME 3.36
- Dark theme
- New lock screen
- Redesigned login screen
- Two factor authentication for SSH
- Automatic Updates via Ubuntu Server Live Installer
- Flexible Bootloader
- and many more…..
Minimum requirements for Ubuntu 20.04 LTS Server:
- 4 GB RAM
- Dual Core Processor
- 25 GB HDD Space
- Bootable Media (USB/DVD)
- Stable Internet Connection
Ubuntu 20.04 LTS Server Installation Step by Step
Step 1) Download Ubuntu 20.04 LTS Server ISO file
Dowload ISO file of Ubuntu 20.04 LTS Server using below button:
![]()
Once the ISO file is downloaded on your system, you can use to in different ways. You can make a bootable USB drive or DVD using tools. If you using VMWare or VirtualBox you can attach ISO Image directly to it.
Step 2) Boot your system using bootable media (USB/DVD/ISO Images)
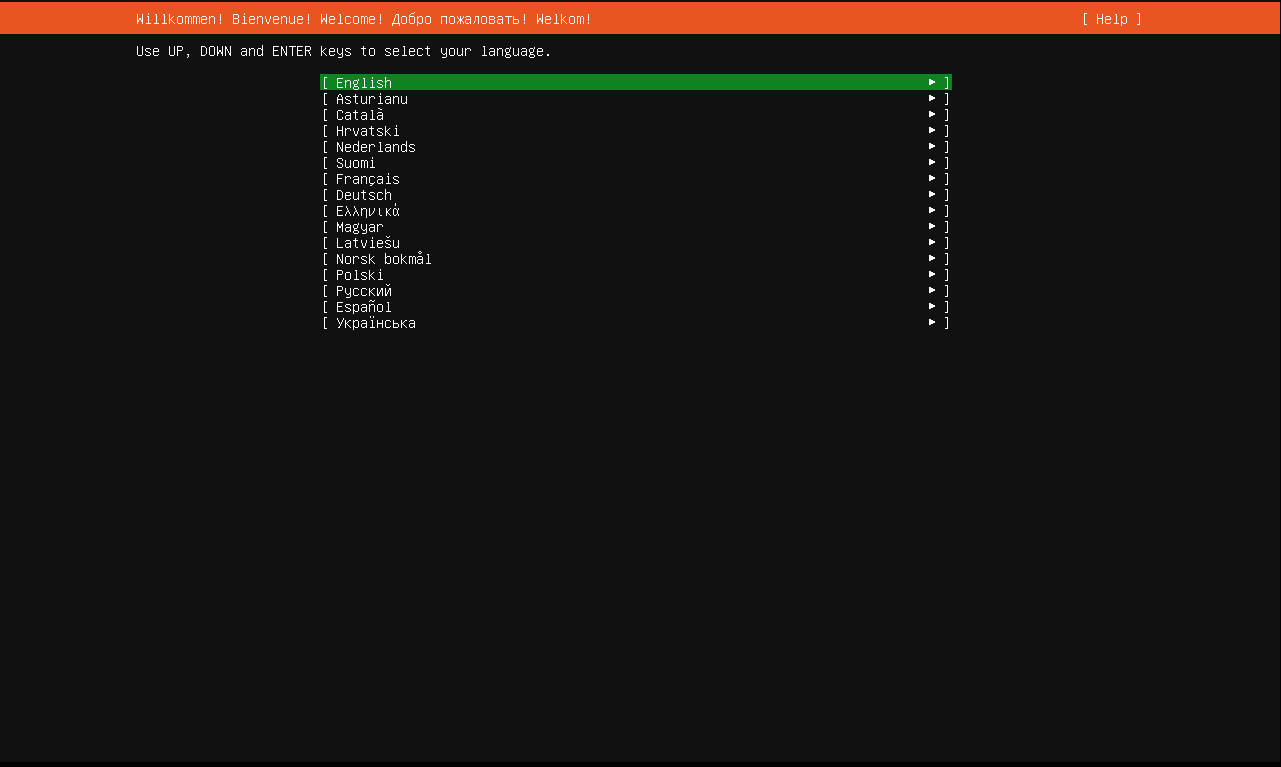
Boot your target system with Downloaded ISO Image or with created USB bootable drive or with DVD, once the target system boots up, we will get the following screen:
Choose your installation languages and then press enter (Here I am selecting English)
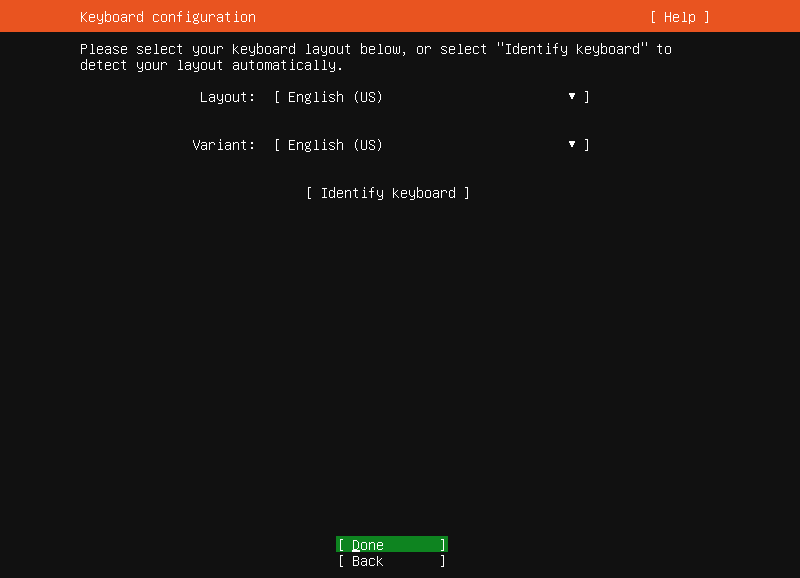
Step 3) Choose Keyboard Layout and press enter to Done
On Keyboard configuration Screen, choose your preferred keyboard layout for your Ubuntu 20.04 Server and then choose "Done" option and press/hit Enter
Step 4) Configure Network Connections
On this step you can configure your Network connection, if your system is connected to the Network, then you will notice Network Interface will automatically pick the IP address via DHCP. If you want to assign IP4/IPv6 address then you can assign here. Here I am doing via Auotmatic DHCP
If you have Multiple Ethernet Cards then you can create a bond interface too.

Choose Done and press Enter button
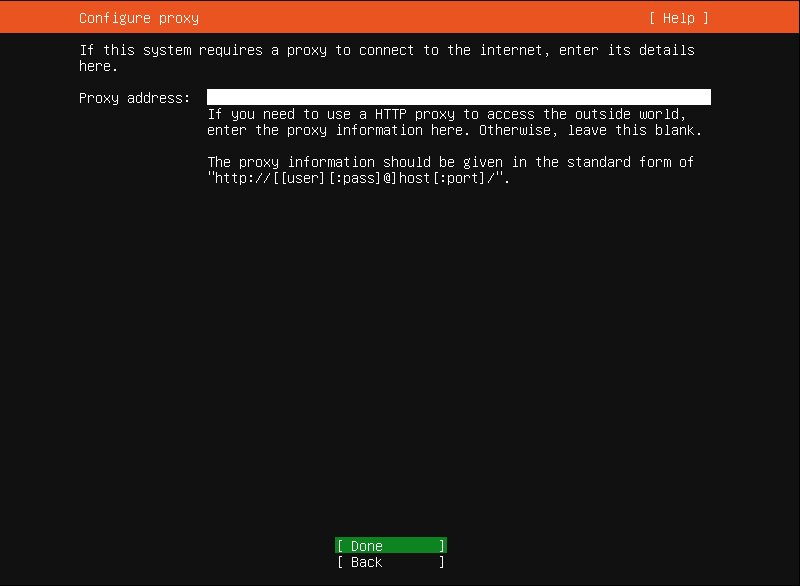
If your system is running behind proxy server, then specify the proxy address and port. If you are not behind proxy you can leave this empty and select Done and press Enter button
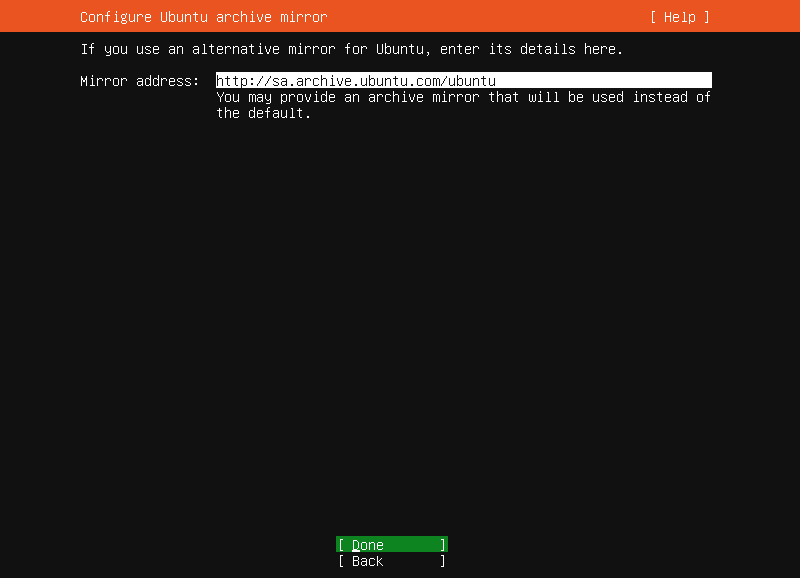
Configure Ubuntu archive mirror, based on your country location. Ubuntu Installer will automatically Configure Ubuntu archive mirror.
Choose Done and press Enter button
 Step 5) Guided Storage configuration
On this step you will be configuring a storage layout for Ubuntu 20.04 LTS Server Installation. You have two options to choose
- Use an entire disk - If you want to Ubuntu Installer to automatically create partitions for you, then choose this option.
- Custom Storage Layout - If you want to create your own customized partition layout, then choose this option.
Here we are using Custom Storage layout so that we can use our 20GB HDD with below
- 1MB BIOS partition - Boot Device
- 1GB /boot parition - ext4
- 15GB "/" partition (with Logical Volume) - xfs format
- 2GB /home (with Logical Volume) - xfs format
- 1.99GB free for future use
Select (x) Custom storage layout
Choose Done and press Enter button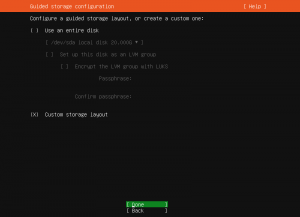
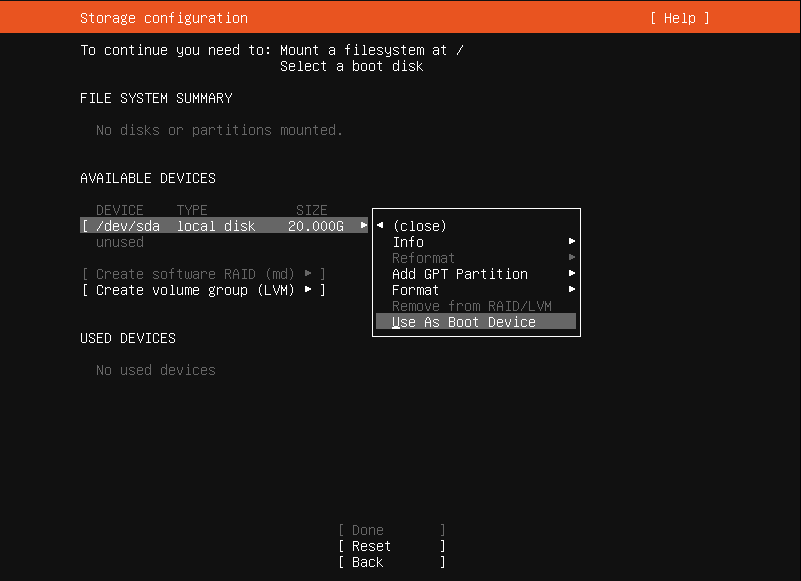
Create EFI or BIOS partition.
This will create a partition of size 1 MB, this will store Grub 2's core and it is mandatory to create this partition for GPT disk.
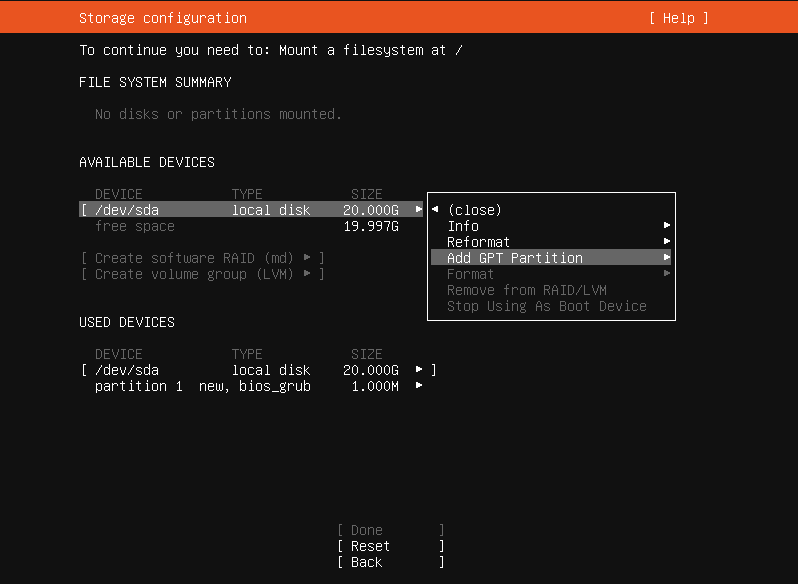
Here we are creating partitions, select device from "Available Devices" with Up & Down Arrow Keys and press Enter button and then select from Drop down menu "Use As Boot Device" option and Press Enter Button
 Create /boot partition
Create /boot partition of size 1 GB. Select device from "Available Devices" with Up/Down Arrow Keys (/dev/sda) and press Enter button and then select from Drop down menu "Add GPT Partition" and then Press Enter
 Next screen, we need to specify size as decided we will give 1GB, select Format (file system type) as ext4 and mount point /boot.
Choose Done and press Enter button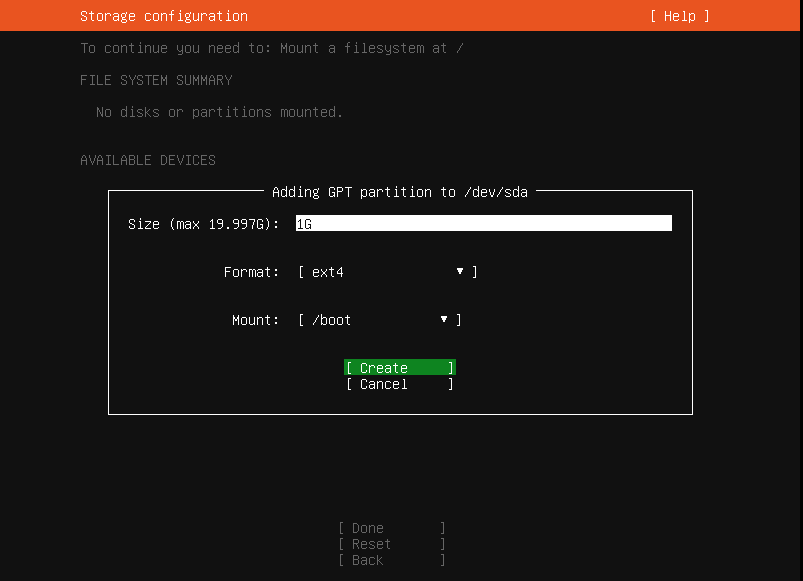 Here we are creating Volume Group so that we can create LVM partitions for '/' and /home partition.
On this screen Select device from "Available Devices" with Up/Down Arrow Keys (/dev/sda) and press Enter button and then select from Drop down menu "Add GPT Partition" and then Press Enter
Choose Done and press Enter buttonOn this screen, leave size empty (uses remaining disk space), do NOT format and do NOT mount. From Format: select "Leave unformatted"
Choose Create and Press Enter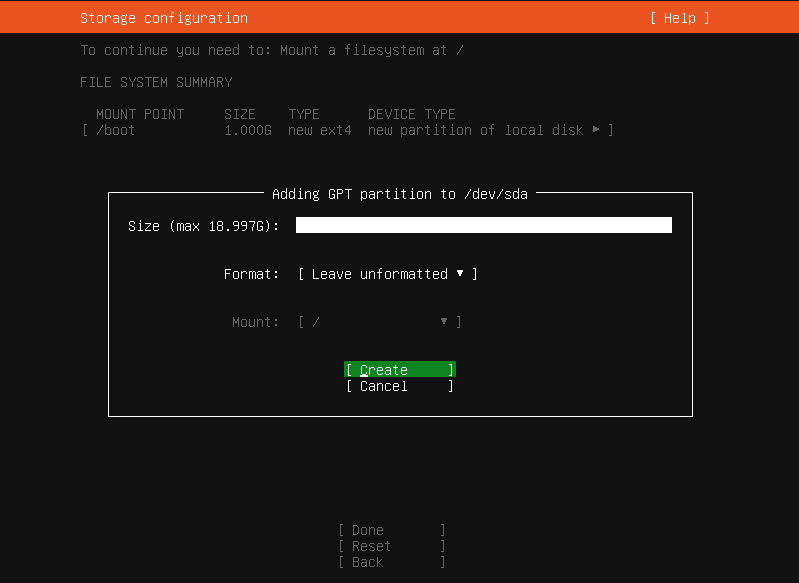 Create Volume Group, select Create Volume Group (LVM), name it and select partition 3 with the checkbox
Choose Create and Press Enter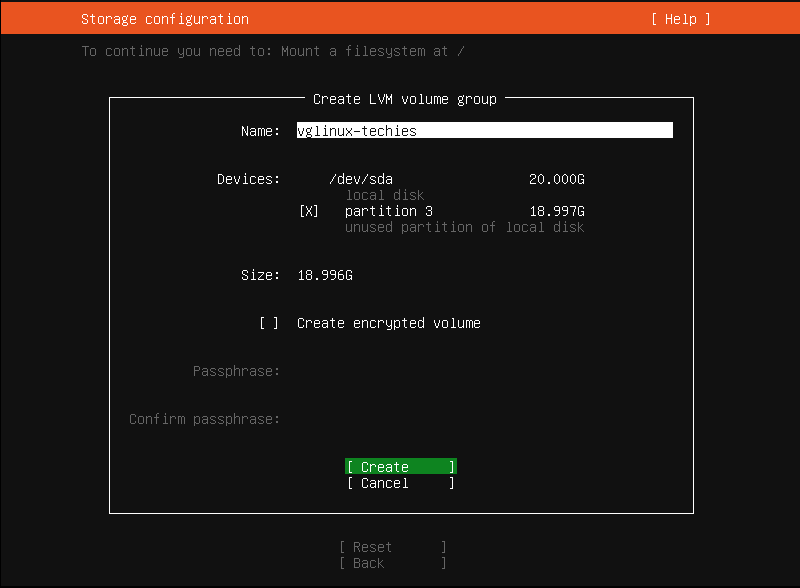 Create Logical Volume(s), Move to the newly created Volume Group, select Create Logical Volume
Press Enter 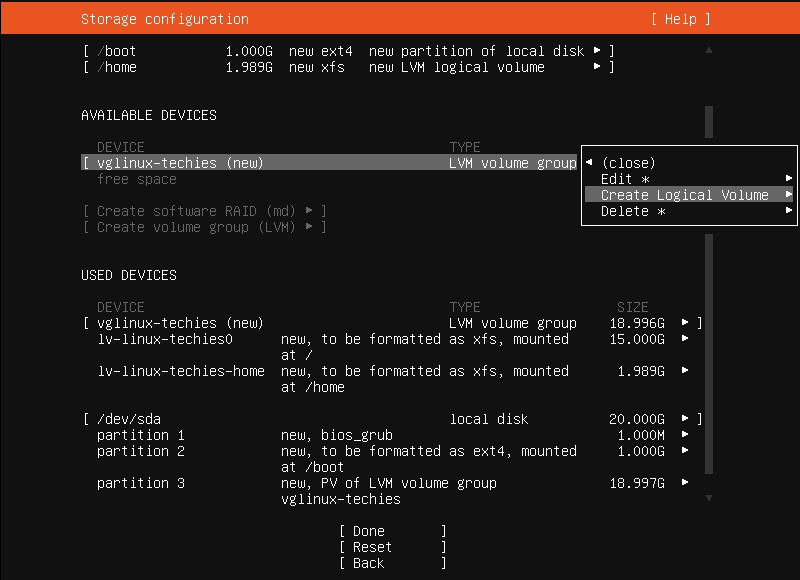 Create "/" partition of size 15GB.
Create it, name it set size (blank for remaining disk space), format it and mount it.
Choose Create and Press Enter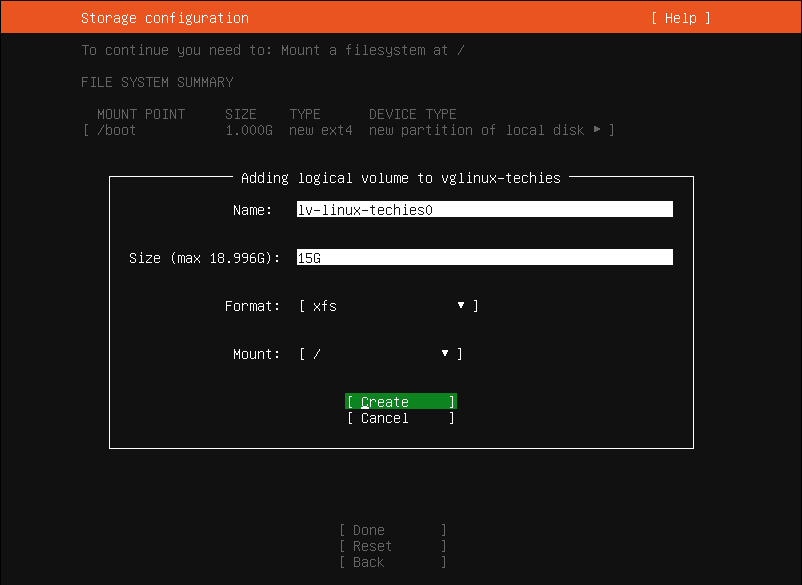 Create Logical Volume(s) for /home partition, Move to the newly created Volume Group, select Create Logical Volume
Press Enter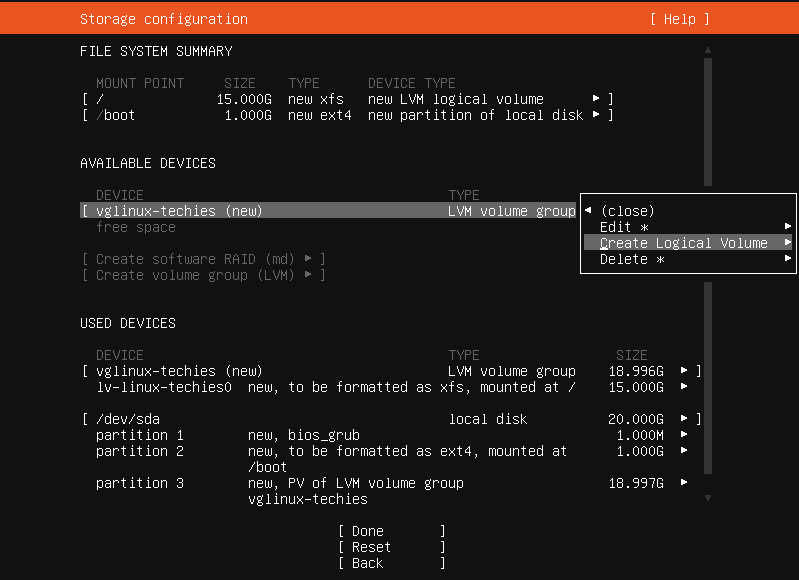 Create "/home" partition of size 2GB.
Create it, name it set size (blank for remaining disk space), format it and mount it.
Choose Create and Press Enter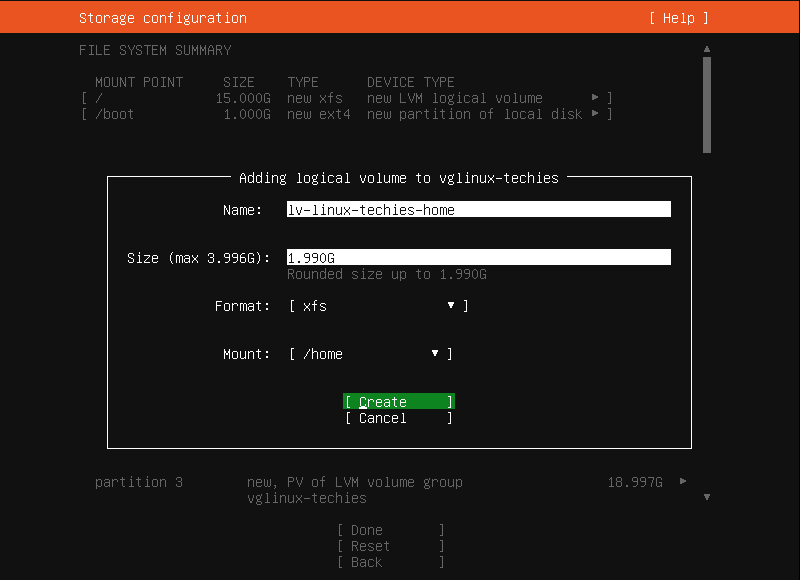 After Pressing Enter Key you are done with partition setup. At this point you get the following screen, verify the partition which you have created and then Choose 'Done' and Press Enter button
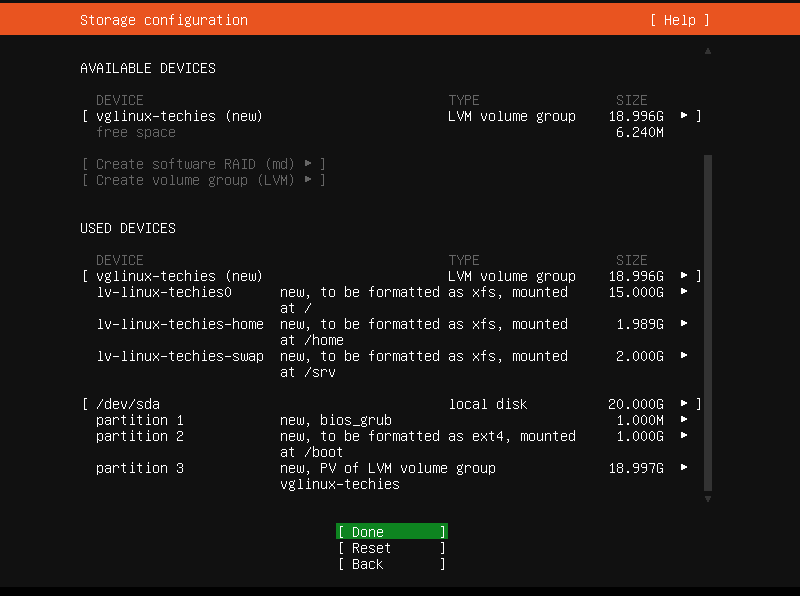 Here select Continue to write your changes into the Disk and proceed with Installation.
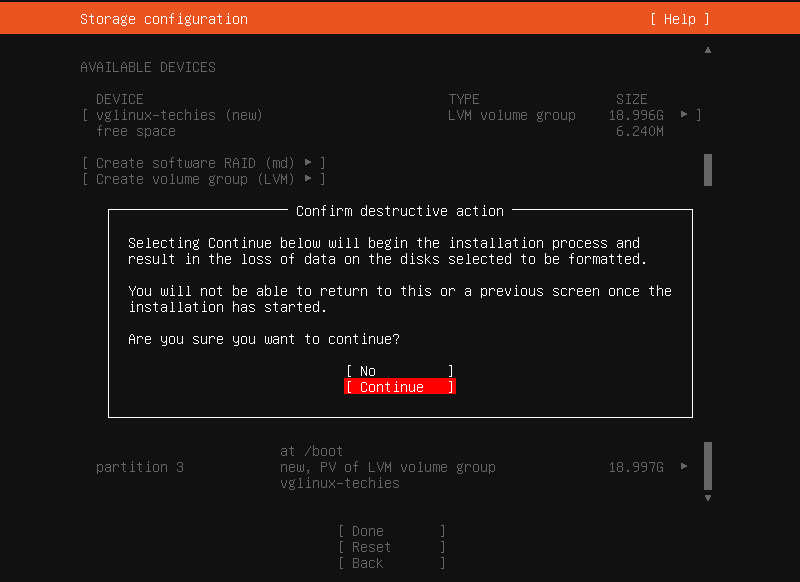 Step 6) Profile Setup
Here we will be setting up, local user details and Hostname that we want to set for our server. Please enter the your details to continue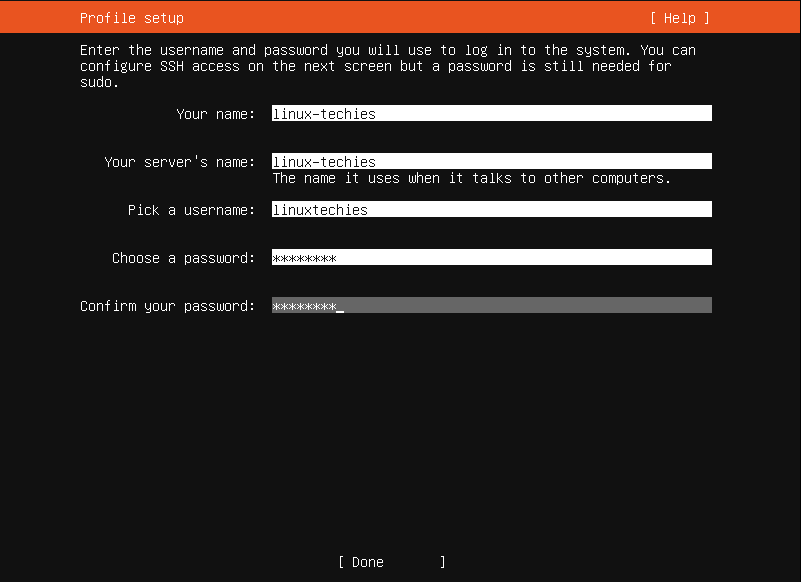 Select Done and Press Enter button
Step 7) SSH Setup
As we are going to access our New Ubuntu 20.04 LTS Server over Network using SSH, we are going to select "Install OpenSSH server"
Choose Done and Press Enter button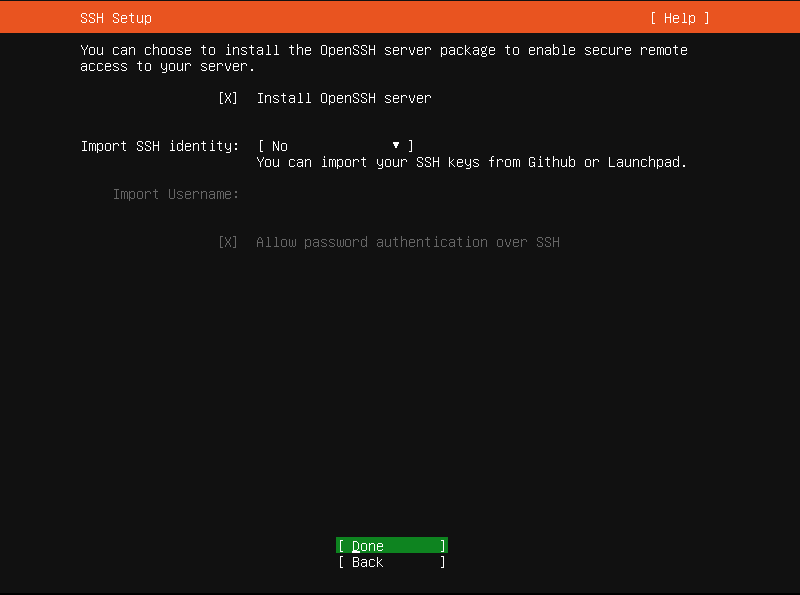 Step 8) Ubuntu 20.04 Server Installation Started
At this point you will notice Ubuntu 20.04 Server Installation Started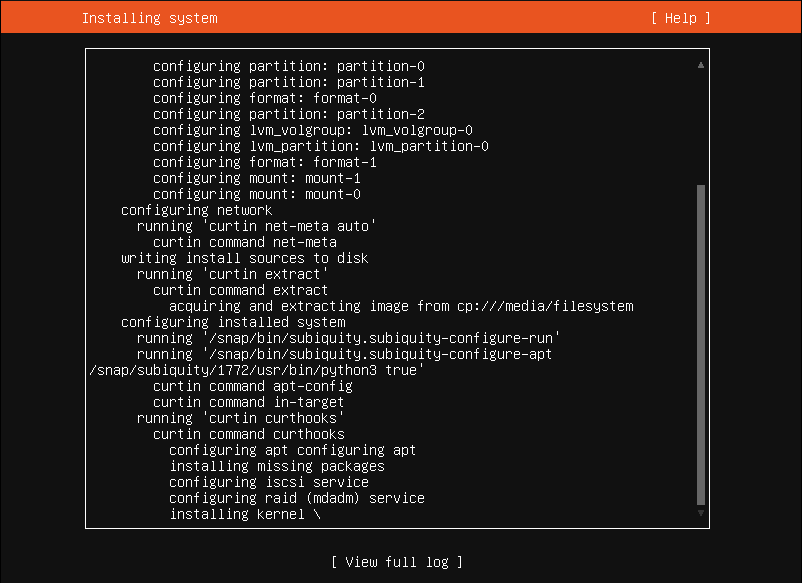 Once the Ubuntu 20.04 Server Installation completed, Ubuntu Installer will prompt to reboot the system. Here I am Selecting 'Cancel update and reboot' and Press Enter Button.
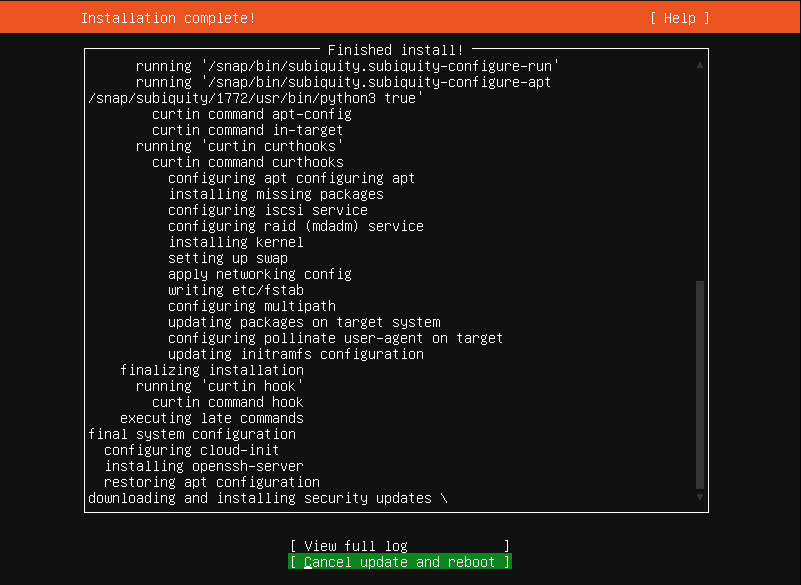
Summary
We have successfully completed "Ubuntu 20.04 LTS ‘Focal Fossa’ Server Installation". If you have any questions or comments please leave them here, or in linuxproguru.com comments section of this site.